Step 1: Research, Budgeting, and Initial Checks
Laying the proper groundwork is the most critical part of the used car buying process. Rushing this stage often leads to costly mistakes. Before you even look at a single vehicle, a clear plan will save you time, money, and future frustration.
Define Your Needs and Budget
First, establish a realistic budget. Remember that the total cost goes beyond the vehicle’s sale price. Your budget should account for:
- The purchase price of the car
- Vehicle transfer and registration fees
- Comprehensive insurance costs
- An emergency fund for initial servicing or unexpected repairs
- The annual Revenue License fee
Next, consider your daily needs. Are you looking for a fuel-efficient car for city commuting, a spacious vehicle for your family, or something with higher ground clearance? Focus on reliable brands with readily available spare parts in Sri Lanka, such as Toyota, Suzuki, and Honda, as they generally have lower maintenance costs and better resale value.
Online Research and Market Value
Utilise popular online marketplaces to understand the current market. Websites like ikman.lk, Riyasewana, and Patpat.lk are excellent resources. Search for your preferred models and compare prices based on the year of manufacture, mileage (odometer reading), and overall condition described in the advertisement. This research helps you identify a fair market price and spot listings that are either overpriced or suspiciously cheap.
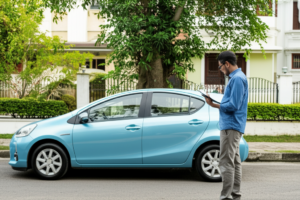
Initial Contact and Screening
Once you have shortlisted a few potential cars, make initial contact with the sellers. A brief phone call can reveal a lot. Ask key questions:
- Are you the registered owner? (Always preferable to deal with the owner directly)
- Is the car’s service history available?
- Has the vehicle been in any major accidents?
- What is the reason for selling?
The seller’s responses will help you filter out unpromising options before you invest time in a physical inspection.

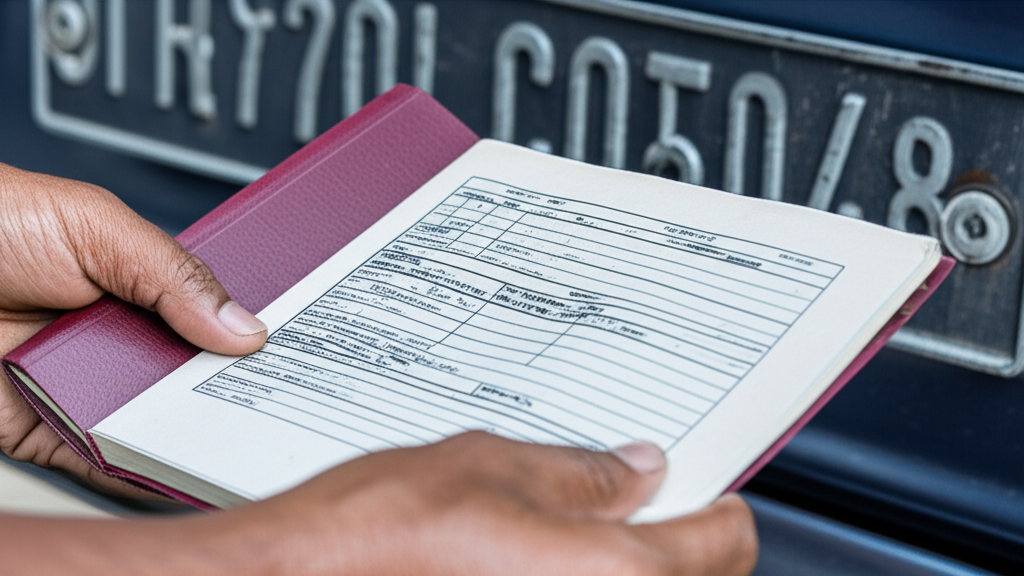
Step 2: The Crucial Document Verification
In Sri Lanka, a car’s paperwork is as vital as its engine. A thorough document check is non-negotiable and protects you from potential legal and financial nightmares. Before discussing price or taking a test drive, insist on inspecting all original documents. Any discrepancies or missing papers are significant red flags.
Carefully examine the following:
- Certificate of Registration (CR Book): This is the most important document. Verify that the owner’s name matches their National Identity Card (NIC). Crucially, cross-reference the chassis and engine numbers listed in the CR book with the numbers physically stamped on the vehicle’s frame and engine block. They must be an exact match. Also, check for endorsements related to engine swaps, colour changes, or other major modifications.
- Revenue Licence: This is the annual road tax payment receipt, often displayed as a sticker. Ensure it is current and has not expired, as this indicates the vehicle is legally permitted on the road.
- Vehicle Emission Test (VET) Certificate: A valid VET certificate is mandatory for renewing the Revenue Licence. Check its expiry date to confirm the car complies with local environmental regulations.
- Insurance Certificate: Confirm the vehicle has an active insurance policy (at least third-party coverage). Check the policy dates and verify that the vehicle details are accurate.
- Transfer Papers (MTA 6 / MTA 8): These forms are required to legally transfer the vehicle’s ownership to your name. Ensure they are correctly filled out and signed by the registered owner.
- Finance/Lease Clearance Letter: If the car was previously under a lease or finance agreement, you must obtain a letter from the financial institution stating that all dues have been fully settled. This prevents you from inheriting the previous owner’s debt.
Never proceed with a deal based on photocopies or promises. If a seller is reluctant to provide these original documents for inspection, it is wisest to walk away.
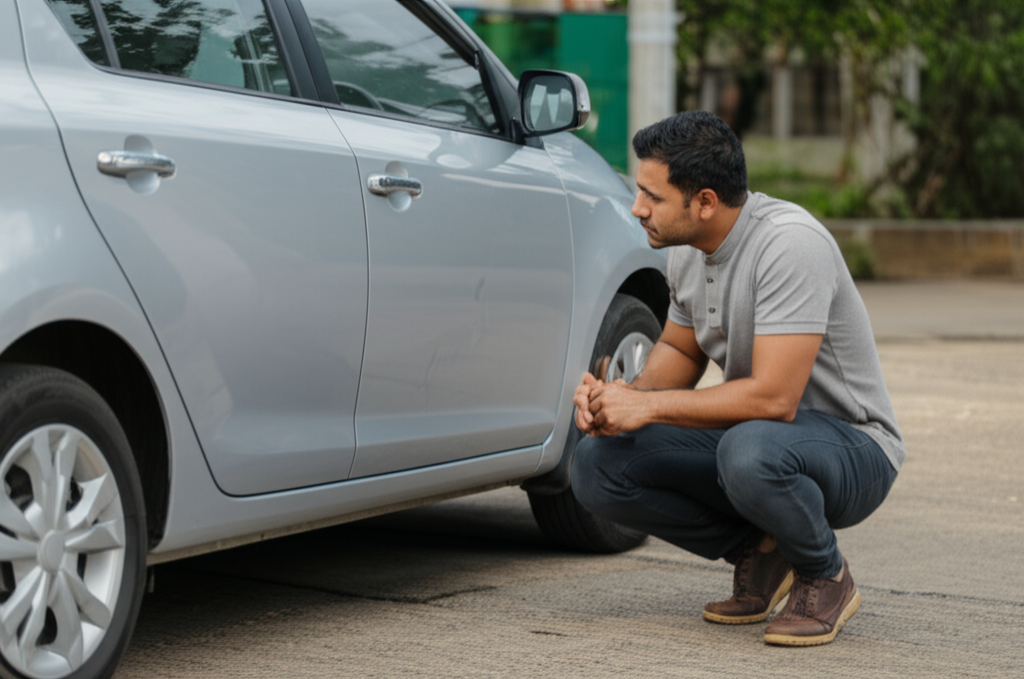
Step 3: Exterior Body and Structural Inspection
A car’s exterior tells a story about its past. Beyond simple cosmetics, a thorough visual inspection can reveal signs of accidents, neglect, and potential future problems. Always inspect the vehicle in broad daylight and on a level surface to get the clearest view.
- Paint and Rust: Walk around the car and look for inconsistencies in the paint colour and finish between different panels. Mismatched paint or overspray on rubber seals and plastic trim often indicates accident repair. Given Sri Lanka’s humid, coastal climate, pay close attention to rust. Check common problem areas like the wheel arches, the bottom of the doors, the boot sill, and around the windscreen. Bubbling paint is a major red flag for underlying corrosion.
- Panel Gaps and Alignment: Examine the gaps between the doors, bonnet, and boot. They should be tight and uniform on all sides. Uneven or wide panel gaps strongly suggest the car has been in a collision and not repaired to a high standard. Ensure all doors, the bonnet, and the boot open and close smoothly.
- Glass, Lights, and Tyres: Inspect the windscreen and all windows for any chips or cracks, as these can be expensive to replace. Check the headlights and taillights for cracks, signs of moisture inside, and ensure they are all working. Look at the tyres for tread depth; uneven wear can point to alignment or suspension problems. Check the tyre walls for any cracks or bulges.
- Undercarriage: Crouch down and look underneath the car, using a torch if necessary. Look for signs of major rust on the frame, fluid leaks, or damage to the exhaust system.
Step 4: Interior, Features, and Electronics Check
The car’s cabin is where you’ll spend your time, so comfort and functionality are key. This step also helps uncover hidden problems like water damage or electrical faults that can be expensive to fix.
Cabin and Upholstery Inspection
- Smell Test: Be wary of strong musty or mouldy smells, which could signal water leaks. Heavy use of air fresheners might be concealing unpleasant odours.
- Seats and Carpets: Inspect all seats for tears, stains, or excessive wear. Lift the floor mats to check the carpet underneath for dampness or rust on the floor pan, a clear sign of a leak.
- Headliner and Dashboard: Look at the roof lining (headliner) for sagging or water stains. Check the dashboard for cracks, which are common from sun exposure in Sri Lanka.
- Seatbelts and Adjustments: Test every seatbelt to ensure it latches and retracts properly. Adjust the driver’s seat to confirm all manual or power controls are working.
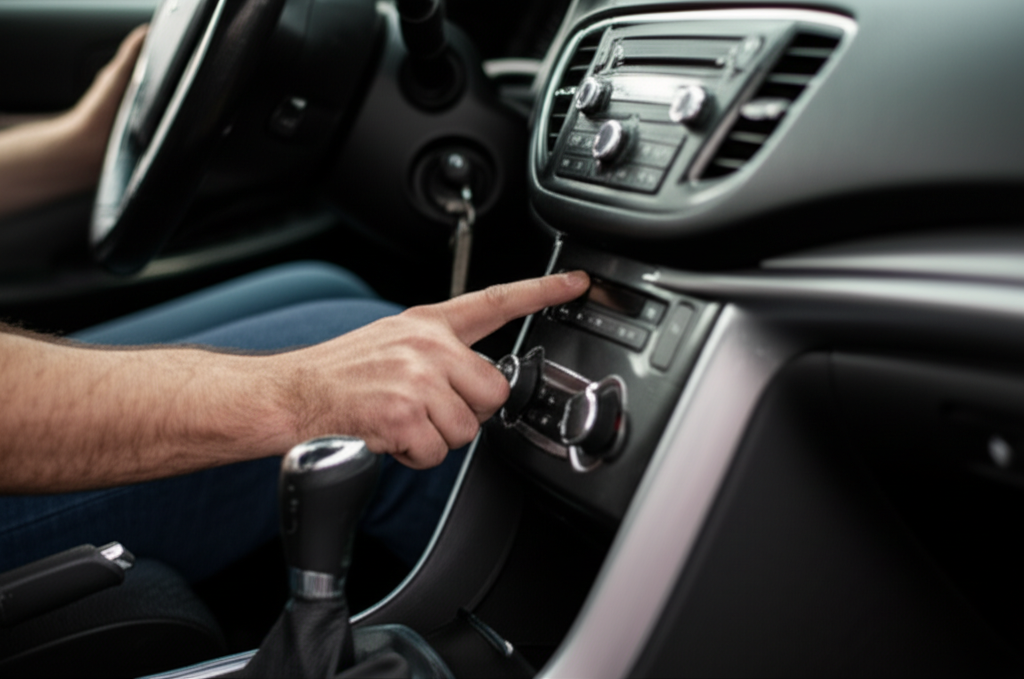
Electronics and Amenities Check
A simple fault can lead to a frustrating ownership experience. Test every button and switch you can find.
- Air Conditioning (A/C): This is crucial. Turn the A/C to its coldest setting and highest fan speed. It should blow cold air within a minute. Listen for any strange noises from the system.
- Warning Lights: Turn the key to the “ON” position without starting the engine. All dashboard warning lights (Check Engine, ABS, Airbag) should light up and then turn off after a few seconds. If any light stays on, it indicates a problem.
- Lights & Wipers: With a helper, check all exterior lights: headlights (high and low beams), indicators, brake lights, and reverse lights. Test the windscreen wipers and washer fluid spray.
- Power Features: Operate all power windows, door locks, and side mirrors. If the vehicle has a sunroof, ensure it opens and closes smoothly without leaking.
- Infotainment System: Check the radio, test all speakers, and try connecting your phone via Bluetooth or USB if available.
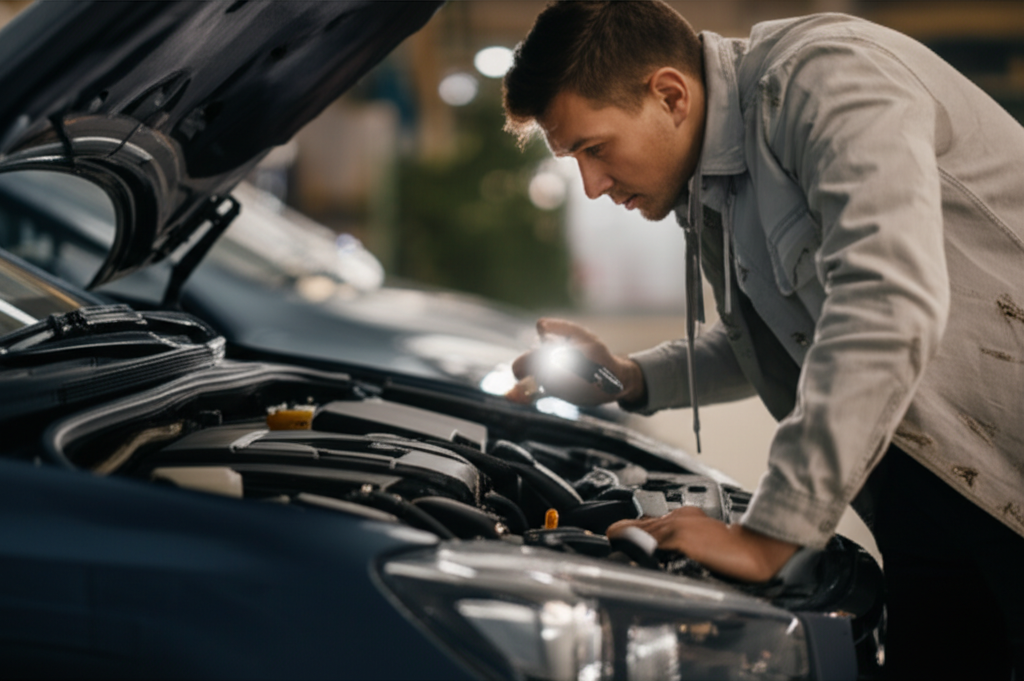
Step 5: Engine Bay and Test Drive
This is the most critical part of the inspection. It reveals the true mechanical health of the vehicle. Always perform these checks when the engine is cold to get an accurate picture and to avoid potential injury.
Under the Bonnet Inspection
With the engine off, open the bonnet and look for the following tell-tale signs:
- Fluid Leaks: Look for any signs of oil (black/brown), coolant (green/pink), or other fluid leaks on the engine block and on the ground beneath the car.
- Oil Check: Pull out the dipstick. The oil should be a honey-brown colour. If it’s black and gritty, it needs changing. If it looks milky or frothy, it could indicate a serious head gasket issue.
- Hoses and Belts: Squeeze the main rubber hoses. They should be firm, not rock-hard, brittle, or soft. Check the belts for cracks and fraying.
- Battery Health: Look for corrosion (a white or greenish powder) around the battery terminals, which could indicate a leak or poor maintenance.
- Coolant: Check the coolant reservoir. The liquid should be clear (usually green or pink). Rusty or oily coolant is a major red flag.
The All-Important Test Drive
A test drive of at least 20 minutes on varied roads (city traffic, open roads) is essential. Turn the radio off and pay attention to the car’s sounds and feelings.
- Starting Up: Does the engine start easily? Note any unusual noises or smoke from the exhaust upon startup.
- Brakes: Test the brakes at various speeds. The car should stop in a straight line without pulling to one side. Listen for any grinding or squealing noises.
- Steering and Suspension: Does the steering feel responsive or loose? Drive over a few small bumps and listen for any clunking or knocking sounds, which could indicate worn suspension parts.
- Transmission: For automatic cars, ensure gear changes are smooth and not jerky. In a manual, check that the clutch engages smoothly and gears can be selected without grinding.
- Check All Features: During the drive, test the air conditioning, lights, indicators, power windows, and wipers to ensure everything works correctly.
Step 6: Professional Opinion and Finalizing the Purchase
Even if the car seems perfect after your personal inspection, this final step is crucial for protecting your investment. An unbiased, expert opinion can uncover hidden problems that may lead to expensive future repairs.
Get a Professional Inspection
Before committing, take the car to a trusted independent mechanic or a reputable vehicle evaluation service in Sri Lanka. They have the diagnostic tools and expertise to perform a much deeper assessment. Their comprehensive report is your best negotiating tool. The inspection should cover:
- Engine and Drivetrain: A compression test, computer diagnostics for error codes, and a check for oil or coolant leaks.
- Chassis and Frame: A thorough check for any signs of major accidents, flood damage, or structural rust that might compromise safety.
- Suspension and Brakes: Evaluation of wear and tear on critical components like shock absorbers, brake pads, and steering linkages.
- Electrical Systems: Testing the battery, alternator, air conditioning, and all electronic features to ensure they function correctly.
Closing the Deal
If the professional inspection gives you the green light, or reveals minor issues you can use to bargain, it’s time to complete the transaction.
- Negotiate the Price: Use the findings from the mechanic’s report to negotiate a final, fair price.
- Arrange Payment: Use a secure method like a bank draft or online transfer. Avoid carrying large sums of cash. Always obtain a signed receipt for the payment.
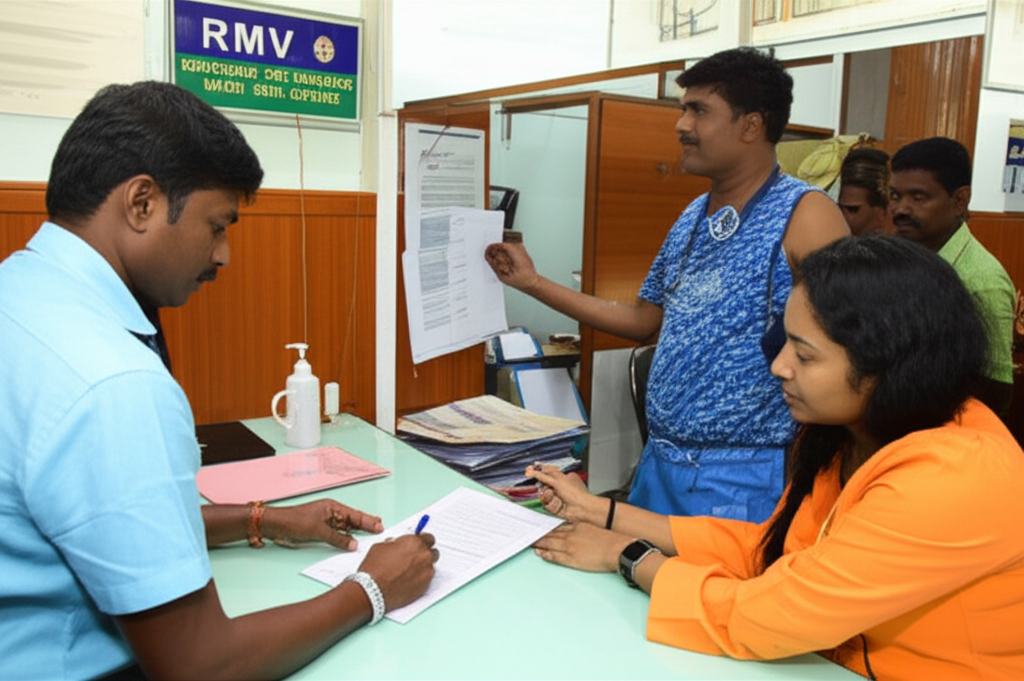
- Complete the Paperwork: This is the most critical part. Properly fill out and sign the transfer of ownership forms (MTA 6 and MTA 8). Ensure the seller’s signature matches their National Identity Card (NIC). It is your responsibility to submit these documents to the Department of Motor Traffic (RMV) to officially transfer the vehicle into your name.
With the keys in hand and the transfer papers filed, you have completed your due diligence. Congratulations on your new car!
References
- Transfer of Vehicle Ownership – Department of Motor Traffic Sri Lanka
- The Ultimate Used Car Buying Guide for Sri Lanka – Ikman Blog
- How to Buy a Used Car in Sri Lanka – A Comprehensive Guide
- The Ultimate Used Car Buying Guide for Sri Lankans – patpat.lk
- Vehicle Revenue License Information – Western Province Department of Motor Traffic
- A guide to buying a used car – AutoLanka Community Forums